
What’s Inside the Box? | Complete Unboxing Guide for HalloweenNail Press-On Nails
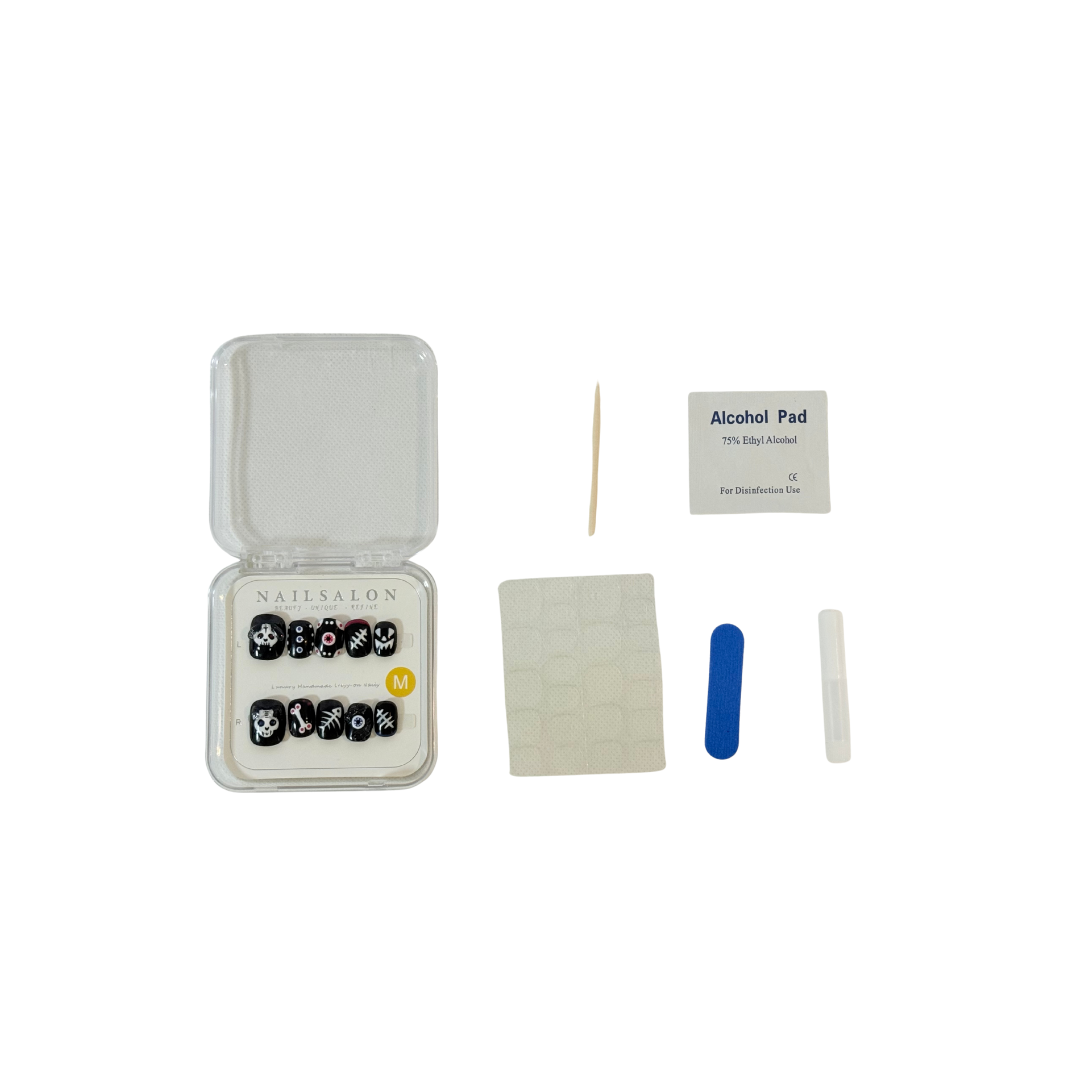
The standard Press-On Nails Kit includes everything you need for a flawless, salon-quality application at home. Styles may vary, accessories stay complete

Premium Press-On Nails (Multiple Sizes)
- High-shine, natural curve, full coverage. Multiple sizes fit most nail beds.
- Tip: Choose the closest fit and lightly refine sides with the mini file.
Strong Nail Glue

- Fast-drying, long-lasting; with proper prep, wear 1–2 weeks (varies by nail type & routine).
- How to: Apply a thin layer; avoid flooding the cuticle area.
- Pro Tip: For short events, use adhesive tabs for gentler removal.
Adhesive Tabs

- Best for temporary wear/photoshoots; easier removal.
- How to: Match size to your nail plate, stick firmly, press nail for 10–15 seconds.
Mini Nail File

- Shape edges, micro-adjust sizing, lightly buff natural nails for better adhesion.
- Note: Light buffing only—avoid over-filing.
Cuticle Stick / Pusher

- Push back cuticles and help lift edges during removal.
- Tip: Clearing dead skin reduces lifting.
Alcohol Prep Wipes

- Degrease & de-dust for superior adhesion.
- Step: Allow nails to dry completely before gluing.
Quick Apply Steps
- Clean with alcohol; let dry.
- Prep: Lightly buff & shape; gently push back cuticles.
- Size all ten nails first.
- Glue or Tabs: Thin layer of glue or place tabs.
- Press at the cuticle and hold 10–30 seconds.
- Aftercare: Avoid water for the first hour.
Visit https://halloweennail.com/